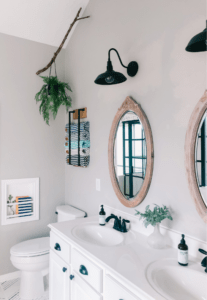
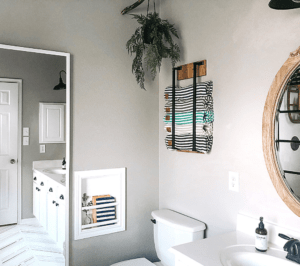
Small bathroom owners- don’t be discouraged! Small bathrooms can be a space you love, as long as you have a place for everything. This towel storage for small bathroom is your game-changer. Because then no matter how small the bathroom is- it feels big enough.
This innovative towel storage will make your small bathroom feel just as luxurious as a bigger bathroom that has a towel closet. All you need is a little wall space available- and you have the perfect storage spot for your freshly laundered towels!
I wanted something that added to my decor rather than just towels hanging from hooks. But- I was also on a super tight budget! I was able to make this towel storage for $16, the price of the towel bars, because I had everything else on hand.
If you’re an avid DIY’er you most likely have lots of the supplies as well!! Even if you do have to buy more of the supplies, like the wood (only $7) and/or the paint, poly, wood stain… no worries because surely you will do more projects, and then you’ll be happy you have so many of the supplies already on hand! All of us have to buy these on the front end of one project or another.
DIY Towel Storage Supplies:
If you’re a regular DIY’er you probably already have the last several supplies!
- 2x Centra 24” towel rod from home depot for $4 each
- 2x Centra towel bar posts $4 each
- 1 x 5 x 8 ft premium kiln-dried square edge whitewood common board for $7 or scrap wood
- Rustoleum Black spray paint for $4
- Black screws to mount wood block into studs (or any screws & paint the heads black)
- Some sort of poly or top coat
- Wood stain for wood mounting blocks if desired
Painting Towel Rods:
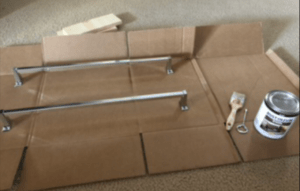
Turns out the only “during” picture I took is this blurry one when I was getting ready to paint the towel bars black…
My bad on the lack of “during” photos. In this photo I had already glued the towel bar pieces together before painting. Use whatever glue you have- my favorites for all my projects are Loctite GO2 Glue & E6000. Then, you basically just have to paint the towel bars. Give them a light sanding before you get started and if you happen to have a deglosser, this is the one I use. Just wipe them with that after sanding & before painting. I’ve learned the hard way that a little bit of prep work is SO worth the trouble in the long run! I did those 2 steps before painting and mine have held up perfectly for over a year and counting!
After rolling your eyes over doing prep work, and then getting it knocked out- paint those bars. It’ll probably take 2-3 coats to fully cover them. Spray paint would obviously be the quickest. I used Rustoleum Black Satin in a can because I had it leftover from painting my shower frame black.
After they’re fully covered in black- use whatever poly or top coat you have laying around. Give them a couple coats of poly for extra protection against dusting and cleaning down the road. Painting the bars may sound like a lot of work, but it is just about 5 minutes on each step and then waiting for paint/poly to dry before spending 5 minutes on the next step… so the hands-on work is minimal & its totally worth it!
Cutting & Staining Mounting Blocks:
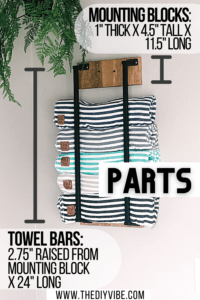
In the mean time you can be cutting and staining your wood mounting blocks. Mine are cut from a 1″ x 5″ x 8′ store-bought Piece of wood. Which in actual dimensions if you measure it, is .75″ x 4.5″ x 11.5.” I used Special Walnut Stain mixed with a little Weathered Oak Stain for this color wood.
Mounting Towel Storage for Small Bathroom
Once you get the towel bars and the wood painted/stained/dried, get excited because your bathroom is so close to feeling upgraded!
It’s time to hang your towel storage. First, find the studs where you’ll be hanging and try to drill into the center of the studs. FYI- In the bathroom, the plumbing pipes run along studs and I have hit one with the drill before. Yep! Water was spraying out of the wall, all over me and everything in the bathroom, until I could frantically call my hubs and figure out how to turn off the water. Ahhhh! So if you shoot for the center of the studs you will be a-okay. Attach your wood mounting blocks to the wall. Just be sure you get one of your screws on each mounting blog into a stud.
Then attach your towel rods to your mounting blocks.
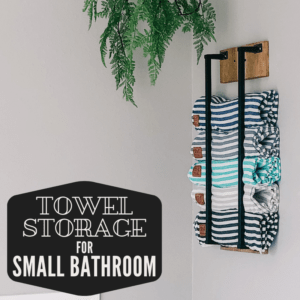
DIY Towel Storage for Small Bathroom Stores Rolled Towels
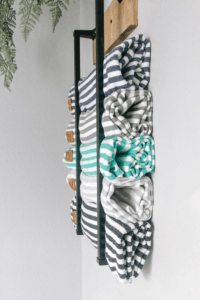
Roll or fold your towels flat & thin, and stack them on up. These are Gold Coast turkish towels from Amazon. They are super thin. The verdict is still out if we like them for bath towels but for pool towels here in TX where its super hot they’re already our fave! Turkish towels are so pretty!
The plus side of them being so thin is that they dry very quickly and therefore won’t get that mildewy smell when you just hang them on a hook to dry and use again. The downside is that they don’t seem as absorbent to me. I read so many reviews before buying them and apparently they will get softer after every wash and we will love them more and more. The kids have always loved them, I think they are growing on me, but I don’t know about the hubby…
We also have waffle knit bath towels that we’ll store in here. Those are a bit thicker than the turkish towels so we fold them flat and thin rather than roll them. If you have really thick towels they may not fit rolled- you can play around with how you fold them to make them look how you like. You can also always add thicker mounting blocks so you have more depth between the wall and the towel bars if you love super thick towels.
Enjoy your towel storage, in your little bathroom. That little bathroom surely feels more dreamy now that you have somewhere for your towels to live that actually adds to your decor!























Leave a Reply