Tree Branch Decor stands out from your other mass produced decor. Tree branch decor adds a rustic element & some natural wood texture to your room.
Theres something that feels so good about bringing the outdoors in and the indoors out when decorating. Not to mention, a tree branch is free and easy to come by!
Here is everything you need to an element of nature inside your home with your own tree branch decor!
- How to Treat a Branch from Outside to Use as Indoor Tree Branch Decor
- 2 Creative Tree Branch Decor Ideas
- The 5 Steps to Hang a DIY Tree Branch Plant Hanger
How to Treat Wood for Tree Branch Decor
You may be sawing a branch from your tree & wonder about what you may be bringing inside with your fresh branch- I’ve been learning everything about how to bring raw wood inside.
First, remove the bark. You can sand it off or sometimes a pocket knife- (Although, using a pocket knife gave me thumb blister when I tried it for a different indoor branch project I’ve got coming up.)
If there is any signs of fungus or bugs spraying it with white vinegar will kill it.
Lastly, if it is going to be used in a way where it matters if it shrinks you will have to wait for it to dry. It can dry out by storing it in your garage for a few months.
*For a branch ready to use for tree branch decor- Michaels sells 5′ Birch branches for $20!
2 Creative Tree Branch Decor Ideas:
There are a couple of ways we’ve added tree branches to our decor:
#1 Tree Branch Curtain Rods
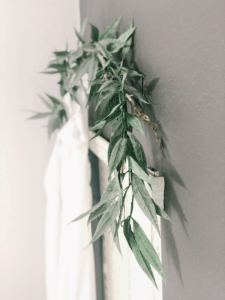
You can read about how we hung them, the faux olive leaf garland strung on them, and see more pictures of here: Tree Branch Curtain Rods.
#2 Tree Branch Plant Holder
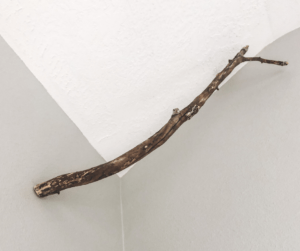
Looking for a unique plant hanger for your plants? This tree branch plant hanger is the perfect answer! I’ll show you how to hang it so it looks like the tree branch is coming out from the wall!
How to Hang a Tree Branch Plant Hanger [5 Steps]
Now to attach your tree branch plant hanger to the wall..
*I’m not saying this is a fool proof way to hang it. This is just how I hung mine & it has been safely in place for 1 year and counting now. You can tap into your inner-engineer to adjust anything you feel the need to!
1. Find a Stud
Use the good old stud finder to see where you’re nearest stud is. Try to aim for the middle of the stud. Bathrooms always make me a bit nervous because I’ve drilled right into a water pipe in our bathroom wall before and water was spraying everywhere! Chaos! Haha, but this time was no prob.
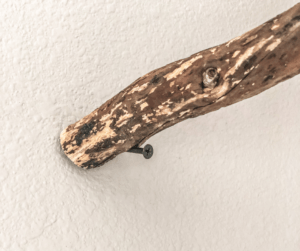
2. Angle Base of Tree Branch to be Flush with the Wall
Hold the branch up to the wall and figure out which way you want it to face and what angle you want it to hang at and then see how the stump of the branch needs to be cut or sanded to sit flush with the wall. I used a power sander to get it flush and smooth against the wall at this angle. It took a few times of sanding, holding it up to see, sanding a little more on this side, or that, holding it up….
3. Drill a Pilot Hole
You will want to hold your branch in place, flush with the wall. Use your other hand to drill a hole through the base of the branch and into the stud. You’ll have to get the pilot hole good and started in the wall before you can remove the branch and finish drilling into the wall to be sure you are going at the proper angle. Make sure you use a long enough screw to go through the branch, and the drywall and go into the stud.
4. Screw the Tree Branch in Place
Use those muscles and screw your long screw through the pilot hold in the branch and into the pilot hole in the wall. Stand back and give yourself some props!!! That is beautiful & smart work you’ve done!
5. Decide Placement of your Hanging Plant
Hold up your plant to decide how far down you want it to hang and how far over on your branch. The closer to the base of the branch the easier for the branch to support it. May want to keep that in mind if it is on the heavier side.
Enjoy the natural, rustic vibes from your Tree Branch Decor!
If you want to see more of our bathroom and how we transformed it on a dime check out these:


