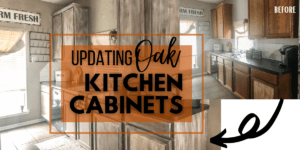
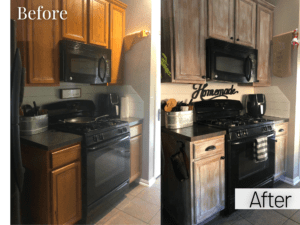
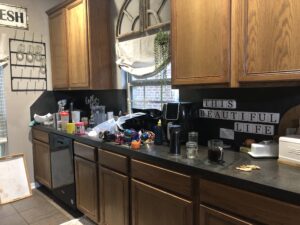
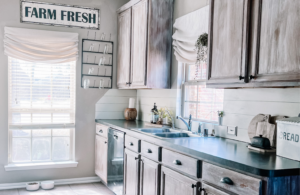
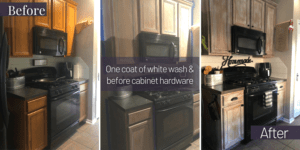
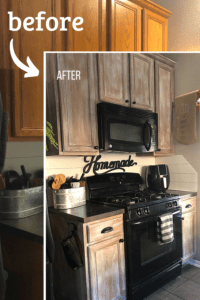
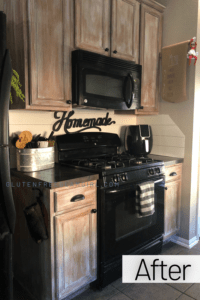
Do these Updating Oak Kitchen Cabinets Before and After Pictures stir up excitement for the possibilities of your honey oak kitchen cabinets?!
These pictures of updating oak kitchen cabinets before and after, excite me all over again about this simple DIY kitchen cabinet project! Updating your kitchen cabinets makes such a huge impact, and right in the heart of your home!
If you are inspired by these Updating Oak Kitchen Cabinets Before and After Pictures, You’ll want to keep reading to discover all of the following:
- Why Choose White Wash Technique to Update Oak Kitchen Cabinets
- Updating Oak Kitchen Cabinets Before and After with White Wax in 4 Steps
- Update Kitchen Cabinets Before and After with Cabinet Hardware
- White Wax Kitchen Cabinet Disclosures
Why Choose White Wash Technique to Update Oak Kitchen Cabinets?
Painting dated kitchen cabinets is what most people default to. But painting kitchen cabinets either A) Costs a ton of money to have professionally done; or B) Takes a lot of learning the expertise to paint cabinets that will last as well as many hours to undertake that kind of massive project. While white cabinets are beautiful, I love the warmth wood grain cabinets give to our kitchen. I didn’t want to loose the richness of the wood cabinets. The perfect solution is the best of both worlds: White Washed Kitchen Cabinets!
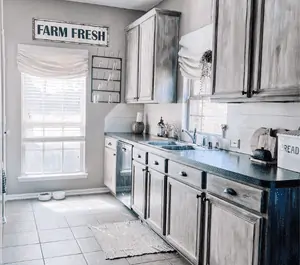
As these updating oak kitchen cabinets before and after photos reveal.. White Washed Kitchen Cabinets boast the warmth and richness of the wood grain! White washing your cabinets brightens up your kitchen. White kitchens are in. This method of updating your kitchen cabinets adds a lot of white to your kitchen, and does it without the stark feel you might get with too much solid white everything.
The time, money & energy white washing cabinets takes is a tiny fraction to that of painting cabinets! Would I do it again? Yes! If I ever move, this will be one of the first projects I do again! The updating oak kitchen cabinets before and after transformation is so easy that it can be done in 1 day! And the total project cost is less than $100!
Updating Oak Kitchen Cabinets Before and After: White Wax
How to White Wax Kitchen Cabinets in 4 Steps:
1. Clean Your Oak Kitchen Cabinets
First things first, you’ll need to give your kitchen cabinets a good cleaning! Cleaning wipes make this step go by the quickest. I would also suggest some grabbing some degreaser for around the stove area.
2. De-Gloss Your Oak Kitchen Cabinets
The white wash will be able to adhere better to de-glossed cabinets. You have a couple of options here, and I did a little of both. You can use a sanding block to give the nooks, crannies and flat surfaces a light sanding. Rub the sanding block over each area of the cabinets, just like with the cleaning wipes- making sure to go over the different parts of each cabinet methodically. Then, I used liquid sandpaper to further de-gloss.
3. White Wax Your Oak Kitchen Cabinets
Before adding the wax, tape off the walls and floors that meet up with the cabinets. Use a large paint brush rather than a traditional waxing brush to get the white-washed look. If your wax isn’t adding enough white for your desired white wash effect you can add some white paint to the wax.
I also found that if you leave the wax open for a bit before you use it it’ll harden a bit and be a little easier to work with. I used a separate stiff bristle paint brush to get into the nooks and crannies on the frame of each cabinet.
Let the first coat dry according to the can before applying a second coat. (I used Behr White Wax mixed with some Ultra Pure White Behr Paint I had from painting our baseboards and interior doors.)
4. Protect Your Updated Oak Kitchen Cabinets
Let the wax cure before adding a top coat. I waited months before doing this step. There are many options of protective top coats- I used Matte Floor Poly that I had to seal the floor paint I used to Paint our Bathroom Floortile. I figured if it is made to stand up to being walked on it- could stand up to the everyday use the cabinets get.
Updating Oak Kitchen Cabinets Before and After: Adding Cabinet Hardware
Cabinet hardware is such a fun way to add more of your style to your kitchen. I love how the matte black hardware complements the white washed kitchen cabinets.
I searched far and wide for affordable but high quality knobs & pulls. After tons of research, I decided on these affordable, quality Bin Drawer Pulls, from Amazon. The simple black cabinet knobs I got to go with them, are timeless, affordable, and also available on Amazon.
These cabinet knobs and drawer pulls add to the industrial farmhouse kitchen I’ve dreamt of having since we moved in!
White-Waxed Kitchen Cabinet Disclosures:
White washed kitchen cabinets are not for everyone. You have to be okay with a bit of a rustic look to enjoy the white washed look because there are “imperfections.” If you are more into factory finishes that are smooth and perfect- you probably won’t love white washed cabinets. From far away you won’t notice the slight imperfections, but up close the area around the cabinet knob has gotten knicks (character!).
The Impact of updating our Oak Kitchen Cabinets Before and After
Overall, this quick and easy and inexpensive DIY project changed the whole vibe of our whole house. The kitchen is visible from everywhere in our home with our open floorplan. Just like these updating kitchen cabinets before and after pictures, peering into our kitchen in real life makes me smile! It feels like ours now. Updating our oak kitchen cabinets was not only inexpensive, but also delivers a big bang for the amount of work!
Enjoy all the angles of the updating oak kitchen cabinets before and after photos in our Farmhouse Kitchen:
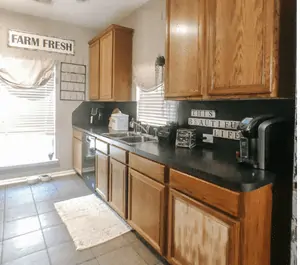
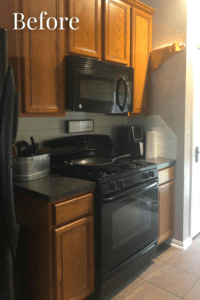
*Updating Oak Kitchen Cabinets Before and After
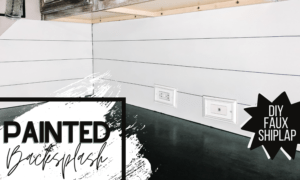
For more DIY kitchen transformations check out how to “Paint Kitchen Backsplash.” This is another project, like updating oak kitchen cabinets before and after, that makes a dramatic impact! And the best place to make a dramatic impact is right in the heart of your home: The kitchen!
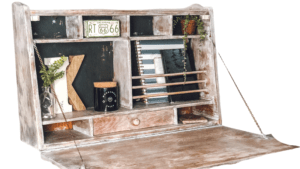
Or for more white waxing projects, check out the Lime-waxing technique I used on this stunning wall-mounted Secretary Desk.
