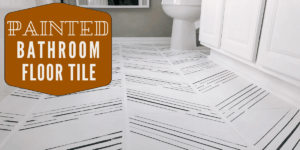
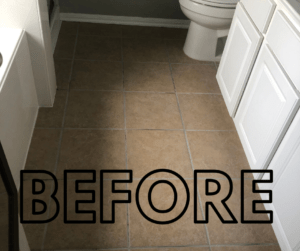
This black and white floor paint pattern reinvigorated our whole Master Bathroom! This herringbone floor paint pattern took our bathroom floor from dull, dated, basic-beige ceramic floor tile- to this fresh, light, & bright modern vibe.
The impact from painting a fresh pattern onto your floor is huge. The floor is the anchor for the whole appearance of a bathroom. Therefore, changing the flooring instantly changes the entire feel of the bathroom. We’ve got that beautiful, bright, luxurious bathroom floor we’ve daydreamed of for our little ensuite for less than $100!
If you’ve considered creating a floor paint pattern in your space you’ve likely seen the same old floor paint pattern stencils over and over. There are not a whole lot of variety available if you add your floor paint pattern via a stencil. You’ll have the same exact floor paint patterns as everyone else.
**Watch the whole process from start to finish on the video at the end of this post!**
Painting Floor Tile- PREP WORK:
This is my second bathroom floor to paint so I learned some things along the way on the last project, most notable being: its all about the prep. This was the step that I didn’t mind so much how small the bathroom was because that meant less tiles to clean, sand & prep for paint. The tedious job that no one likes to do.
- First I cleaned each tile with Krud Kutter’s No-Rinse Prepaint Cleaner. This cleans and takes the gloss off.
- Then I sanded the tiles with the power sander using course sandpaper. I used sanding blocks for the areas the power sander couldn’t get to- like the corners and under the cabinets.
- Then I used a wire bristle brush and gave the grout all a good scrub.
- After that I used TSP to give everything a good clean. This is a strong chemical so I re-read the box every time to make sure I get the correct ratio & wear gloves. You also can’t pour it down the drain when you’re done. Its a whole process but it is the strongest and the best pre-paint cleaner, so when you want to be sure you’ve done your prep well… this is it. I rinsed off the TSP warm water and rags and then also with the steam mop 2 twice to be sure it was all rinsed off and my paint would stick well.
Painting Floor Tile- PRIMER COAT:
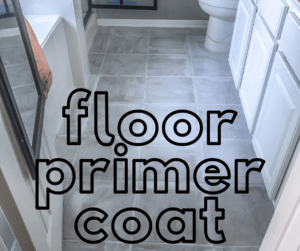
Next I used Zinnser Bullseye Primer in white. I used a brush to apply that to the grout and the tile. Only 1 coat needed and it can be top coated in 1 hour, so this step was super quick!
Painting Floor Tile- FLOOR PAINT:
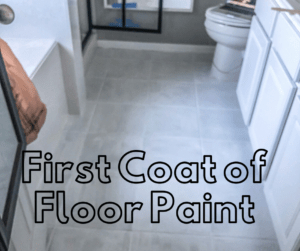
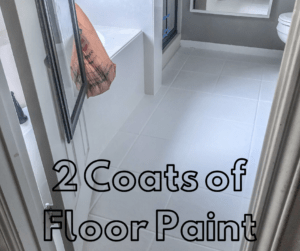
The most exciting part- adding the first coat of floor paint. This was my first project with Behr Porch & Patio Floor Paint. I used it in Low-Lustre Ultra Pure White. I painted over the grout and tiles with a big angled brush. The recoat time on this is 4-6 hours so I got both coats on in 1 day.
Adding Floor Paint Pattern- DIY HERRINGBONE STENCIL PATTERN:
I let the freshly painted floor tile sit for about 48 hours while I planned and practiced my herringbone floor paint pattern on a piece of scrap wood. For this design I used painter’s tape as my stencil and a sponge to apply. The paint I used was a sample size of Behr Marque Flat Paint in Sherwin Williams Tricorn Black.
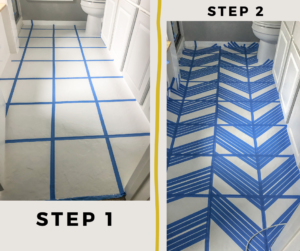
First thing I did was tape the grout lines with painters tape so that I would have a clean, uniform part where the floor paint design stops on each tile. Then I taped the herringbone floor paint pattern onto the tiles. One diagonal section of herringbone on each row of tile.
DIY HERRINGBONE PATTERN TIPS:
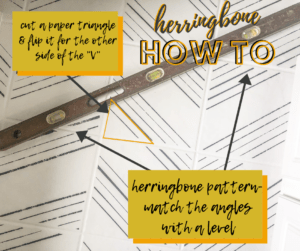
One thing I would do differently is make the diagonal lines on each part the same angle. I was at a loss of how to do this other than eyeballing it when I was in the midst of it. But now, I would have used the long level (or any long flat edge and go from one diagonal to the next column in the same direction to get the start.
Then cut a piece of paper lining the edge to the edge of the tile and cut along the line so you can flip it and use it for the other side of the “V” to get that direction going at the same angle. Once you get one diagonal line in each column it is pretty easy to get the rest in the row by eye.
After I got all the blue tape down I sponged the tricorn black paint on in between the painters tape to make the herringbone floor paint pattern. I liked the more imperfect ones where I used less paint and let some white shine through rather than the dark crisp black lines when I used more paint and covered the white completely.
I pulled off all the painters tape while the black paint was still wet. My creative little 9 year old asked if she could, “do the honors” and pull off the tape. So I had a helper for this part! We got a few smudges of black paint here and there and I just touched those up by going over them with the white floor paint.
Floor Paint Top Coat:
None, so far. I was planning on doing a top coat with Floor Poly, but I could tell this paint seemed so durable. If it can hold up on porches and patios in the rain and dirt of the outdoors it can handle our wet feet getting out of the shower and the dirt and dust inside. Besides if I need to touch up anything it will be so easy without a top coat overtop. It has such a nice matte finish it looks great as it is!
Using the white really brightened up our bathroom! I love the transformation that painting the floor tile made for the whole bathroom. The whole feel and vibe of the room is different!
Here is a video of the whole transformation from start to finish:
Painting this Floor Paint Pattern on our bathroom floor was step 1 to our Master Bathroom Facelift! We will be sure to show you everything else we are working on to refresh this cute little bathroom!
If you want to see another idea besides adding a floor paint pattern, you could paint your tile to look like high end slate tile. We painted our other bathroom floor with this Faux Slate Tile Method! The tile in that bathroom was the same builder beige ceramic tile to begin with. But now it has a rich variety of marbled gray slate tones!
