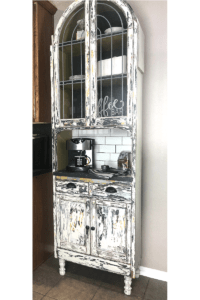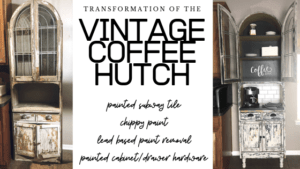
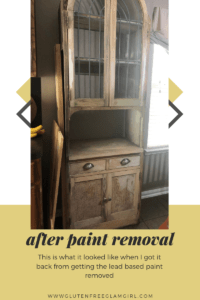
The transformation of this coffee hutch has ended up being quite the project! I got it off of Facebook marketplace for $100. I was SO pumped that I loved how it looked just as it was! In my mind, I was thinking a top coat, some new door hardware, and DONE. Easiest piece ever ..then as paint chips kept falling off of it by the minute it occurred to me to test it for lead-based paint… dun, dun, dun, dunnnn.. it was LEAD-BASED and falling off in my kitchen. I have never dealt with lead based paint and google scared me enough to not try to deal with it myself so I found a lady that removed it for me (for $200).

The coffee hutch needed a paint and top coat that would stand up to daily wiping and washing of the countertop of it, and also be food safe. A little research led me to try Fusion Mineral Paints (colors: Ash & Putty) & Fusion Matte Tough Coat Finish. The paint went on so smooth and had NO odor. Although, I did end up pulling out old paint from the garage to use as well because I needed more colors. But then it was all sealed with 2 coats of Fusion Matte Tough Coat Finish. The finish looks and feels great now and I will let you know how it holds up as time goes on!
Now, after paint removal, paint & finish, I was about $400 in…. and I’m thinking I could have prob bought anything I wanted for that price… well thats just how some projects go, right?! Learn from my mistakes and think about lead based paint next time you are picking up an antique with paint falling off of it…
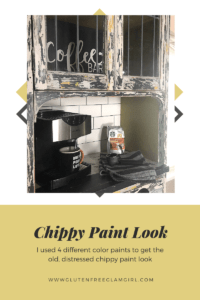
Chippy Paint Technique
This Chippy Paint Look is made with the Wax & Scrape Technique. Sawdust Girl has a great tutorial video that I learned from one chippy paint project back, (my Keene Homestead Sign). For another chippy paint technique, check out the other method (involving tape, a razor blade, and a wire bristle brush) on our Vintage Wall Mounted Desk.

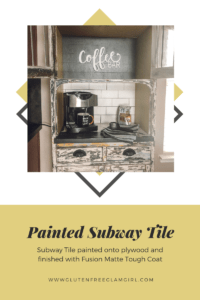
Painted Backsplash
I added a back to it out of some thin plywood and painted a subway tile backsplash. I’ll write a detailed post about how I did that so this isn’t a novel.

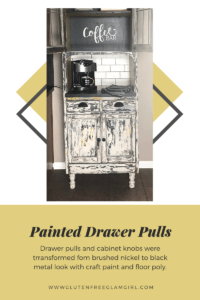
Painted Drawer/Cabinet Hardware
The brushed nickel cabinet hardware was painted with metallic black craft paint and then finished with floor poly I had left from my bathroom floor project… I’ll let you know how the painted door hardware holds up as well.

Adding Wooden Feet
It also needed feet added to it. I discovered how expensive furniture feet are during an internet shopping sesh! But, when I was at Home Depot I saw these for $5 a piece! They were fool proof to attach- wha-la!

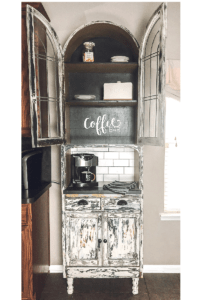
I absolutely love this piece now. The colors and the distressed, edgy look are full of style. I also love the character of the leaded windows and the arched top.

The Real-Real of This Coffee Hutch
The real-real- I want to disclose the honest truth about all my projects so you know what you’re getting into if you want to try any of these at home! The real deal on this vintage coffee hutch transformation: The counter-to-cabinet height is short. My regular coffee maker is too tall to fit in there. I do have a shorter espresso maker that I plan to use regular again, that does fit. The sides of the cabinet are unfinished and leave something to be desired.
This project cost more and took longer than I had originally thought. Now that it is finished, I don’t think I’d do it all over again. I’d use that $400 and find a cool piece that was counter-height and then add open shelving above it. That way you could make the dimensions custom to your coffee maker, etc.
Thanks for reading, happy creating of your own!!
Coffee cheers, xoxo
Update: I sold this Vintage Coffee Hutch for $600 & Created a new larger coffee bar, check it out here! And for more Coffee Hutch/Bar Inspo- check out my latest Coffee Bar post: 7 Tips for Designing your Home Coffee Bar!

