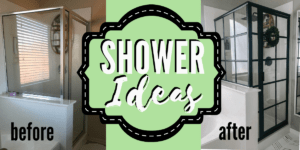
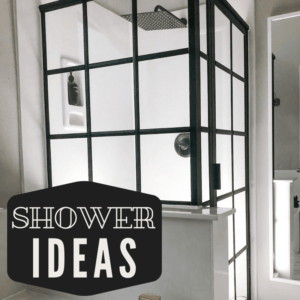
Our basic builder-grade stand up shower went from zero visual appeal to being one of the most attention-grabbing elements in our home! We implemented 3 different Stand Up Shower Ideas to totally transform our small shower stall on a tiny budget. These DIY Stand Up Shower Ideas gave our dull shower some style and luxury.
The 3 stand up shower ideas to instantly upgrade your basic shower to a luxury level are:
- Paint Shower Door Frame
- Add Window Grids to Glass Shower Enclosure
- Incorporate Luxury Shower Accessories
Here are tutorials, tips and tricks for each of these 3 stand up shower ideas!
Stand Up Shower Idea #1: Paint Shower Door Frame
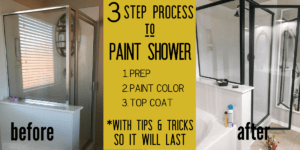
The first of the 3 stand up shower ideas, is to paint the shower door frame and fixtures. This stand up shower was as basic as they come with a shiny chrome frame and chrome shower fixtures. I’ve painted bathroom plumbing fixtures the wrong way and figured out some tips and tricks to paint them to LAST! These painted shower fixtures have held up for 3 years, and are going strong!
STEP 1 is PREP WORK
It’s all about the prep work. This is the unglamorous part. I do the amount of prep work you’d think would be sufficient and then do a little more. Here the prep process to paint plumbing fixtures that will last:
-
- Clean them with Krud Kutter Pre-Paint Cleaner and paper towels.
- Sand them really good with steel wool while wearing gloves. Make sure you get every area well. (You can repeat the first 2 steps again to be sure its all de-glossed and roughed up enough for paint to stick to it.)
- Wipe down with Klean-Strip Liquid Sandpaper and a clean lint free rag.
- Let it air dry.
If you don’t have either of these products- you will have them for many more projects to come! I’ve had my same bottles of both of these for countless projects on all different surfaces.
STEP 2 is BLACK PAINT
This same paint has been used on so many surfaces in my house- Rust-Oleum Satin Black Oil Based Paint. I do 2 coats of this paint with 12 hours of dry time in between coats. I like to use a small smooth brush to get into all the crevices. Oil based paint is a bit messy and you can’t get it off of things with regular soap & water, but paint thinner will take it right off if you end up with drips. (Just don’t let it sit for a long time before you get it off.)
STEP 3 is the TOP COAT
This is a secret tip I’ve learned! I use Varathane Matte Floor Poly as my top coat. (I have found it the least expensive to order from Menards- check it out here. It does seam expensive but I can’t even list all the projects I’ve done with this one gallon of it and I still have half a gallon left!) It is more durable than regular Poly! I know because I’ve tried both on bathroom fixtures. The floor poly holds up amazingly, and the other… not so much.
The Varathane Floor Poly can says to apply at least 4 coats with only a couple hours of dry time in between coats, so you can get this step all done in one day easy. If at all possible wait 30 days for the poly to cure before you use the shower if you are painting the inside of the frame as well so it can cure before it is gets wet.
Stand Up Shower Idea #2: DIY Window Grid on Glass Shower Enclosure
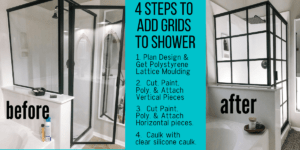
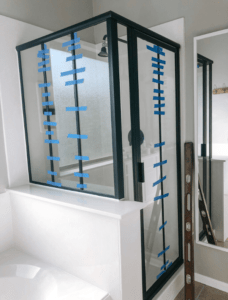
This is one of the best stand up shower ideas I’ve seen! I thought of this idea, and was thrilled to find Robert & Lauren’s blog over at Bless’er House where they executed this beautifully. I pretty much followed her tutorial besides the painting part. To paint them I used the same process as I did on the shower frame so it would match! Here is the process to create the Window Grid Shower Doors:
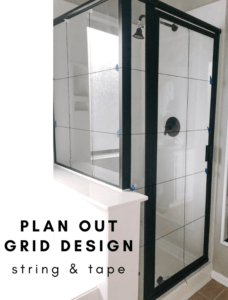
- Plan out design & get the Polystyrene Lattice Moulding (get flat moulding if you can find it- I could only get rounded at the hardware store by me, so that’s what I used.) It is lightweight & very inexpensive.
- Cut the vertical pieces, paint & poly them. Attach them with the Loctite Go 2 Glue using the measured marks & a long level. Wipe any glue that leaks out away with a clean cloth while its wet and then hold it into place with some painters tape while it dries. **If I could go back and redo this part I would have used a brush to cover the whole back of the moulding with the glue rather than just putting a line down the back because it would look even cleaner from the inside and might save some effort on the caulking next.
- Then I measured the vertical pieces each individually because even though the moulding looks straight it is off by a few millimeters in different squares. Then cut, paint, poly, & attach those. Taking the painter’s tape off of these final pieces is SO rewarding! You will truly see your vision come to life!
- Final step is to caulk the grids with clear silicone caulk as shown in this video. This will prevent any debris from getting caught in the cracks.
Here is a video version of the process of adding window grids to your stand up shower enclosure:
Stand Up Shower Idea #3: Add Luxury Accessories
The last of the stand up shower ideas is to adorn your small shower with luxurious shower accessories.
- The Teak Wood Shower Caddy was a splurge but after reading the reviews I ordered one. That was years ago and its still going strong!
- The Rain Shower Head just gives a little bit of a luxurious feel. I would love a hand held to go along with it someday.
- To decorate or not to decorate it… I have hung a boxwood wreath on there for now, but also love it crisp & clean. Whats your vote?
Hope these 3 stand up shower ideas give you a newfound excitement about your basic shower stall!
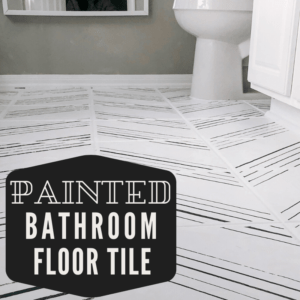
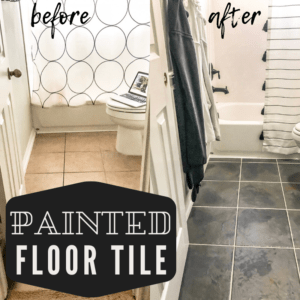
Looking for more Bathroom Ideas- all the details for our Painted Bathroom Floor Tile can be found here! This project along with the Shower Ideas changed the whole feel of the bathroom!




















How long has it been since you did this and how has it held up? I’m looking to do the same on a guest bathroom shower I’m our house!
Overall it has held up great! The grid is still perfect. There are some paint chips down at the very bottom of the ‘chrome-painted-black’ door because that spot always gets sitting water after every shower… but I will do an update post soon with a solution I have in mind for that one problem area!
I’d love to see yours when you complete it!!! It’s such an exciting transformation!
Hi! What did you use to cut the moulding?
I used a Hand Saw with a Miter Box to get straight cuts.