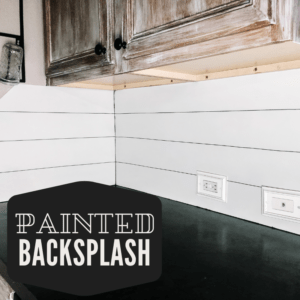
Is your kitchen in need of some revitalization? Painted backsplash is an easy DIY project that can revive your kitchen on a budget! Typically, if you want to change your kitchen backsplash, you’ll need to buy the tile and pay for the labor to install it. Thus making new kitchen backsplash a pricey undertaking. But you can get the look of your dream kitchen for a WHOLE LOT LESS, if you use this painted backsplash DIY to change up your kitchen backsplash!
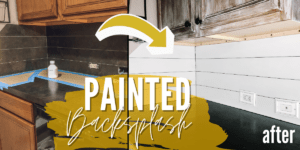
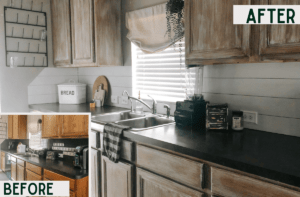
Before we painted our kitchen backsplash the dark laminate countertops went up the wall as the backsplash as well. Changing this dark backsplash into white backsplash would lighten and brighten up the kitchen. I thought a white shiplap backsplash would give our kitchen a nice farmhouse flair. We ultimately got the white backsplash look we wanted for far less than installing new backsplash- with this easy Painted Backsplash project!
5 Step Process for Painted Backsplash:
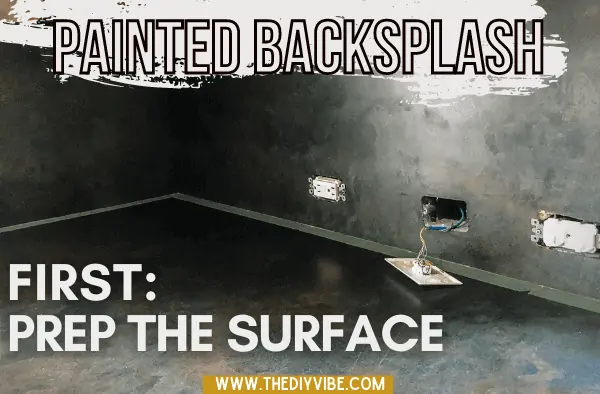
Step 1: Prep
Step one of any paint project, the prep work, is always a drag. But I’ve learned the hard way it is also the most important. Be meticulous with your cleaning and taping because you when its time to pull off that tape and you’ve got perfect crisp lines it will have been worth it! A year down the road, when the painted backsplash is all still perfectly in tact, you will also thank yourself.
To prepare the surface, I first degreased it the laminate backsplash. Then washed it with dawn dish soap, and then again with this TSP Substitute.
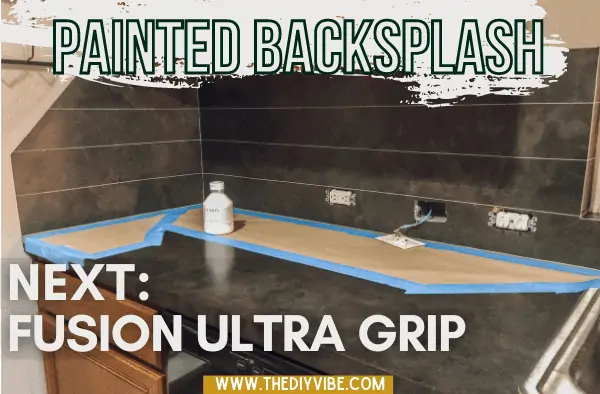
After the surface was cleaned it was time to protect the countertop so it didn’t get paint spills and splats in the process. I taped off where the countertop meets the backsplash. And finally, I covered the countertops- because truth be told, I am a messy painter, ha!
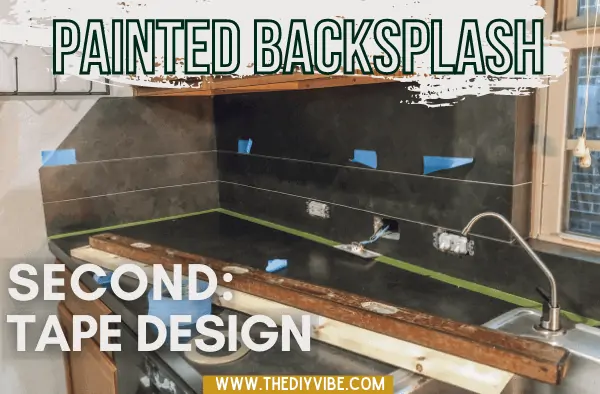
Step 2: Measure and Tape Out Backsplash Design
If you want a Shiplap Backsplash design there is just a tiny bit of math involved. First step- measure the height of the backsplash and divide it evenly by 4. In my case I’d have 4, 4.5″ wide Shiplap Planks all the way around. Then measure and use a long level to mark along the whole line before applying this Fine Line Painter’s Tape.
You could easily add this thin painter’s tape between the planks every 6″ to make a painted subway tile backsplash. You’d want to stagger the vertical lines so that it appears just as subway tile would be applied. Laying out your design with the thin painter’s tape takes some concentration, but its all reckless painting fun from here!
Step 3: Prime Backsplash with Fusion Ultra Grip
Fusion’s Ultra Grip acts as a primer for surfaces that can be difficult for paint to adhere. Since our backsplash is a smooth laminate, and I wanted this Shiplap Painted Backsplash to hold up for years, I used Fusion Ultra Grip as my base. You’ll notice that Fusion Ultra Grip adds a fine texture when it dries, this is how it allows the paint to adhere to a super smooth surface and stay put.
This base coat primer dries clear, so you won’t see any difference. But, you’ll know you did your due-dilligence to make all your work last.
Be sure to follow the instructions on the bottle- And allow 12 hours between applying the Ultra Grip and beginning to apply your first coat of paint over it
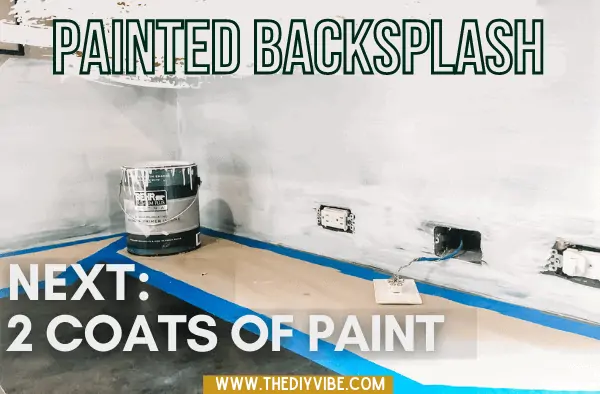
Step 4: Apply 2 Coats of Paint to Backsplash
Woohoo, its finally time to paint your painted backsplash! Apply the paint of your choice. (After all the hundreds of paint projects I’ve done over the years Behr Marque is my absolute paint of choice. Its more expensive but worth it, because of its fuller coverage and how it lasts. If you try to use Behr Marque with Wax or Vaseline for a scratch off Antiqued look it can even stay on if you don’t do a thick enough patch of Wax or Vaseline. Thats how impressive it is.) If the budget is tight I use Behr Premium Plus Ultra, like I did on this project. I got my paint mixed in the color ‘Paper White’, in a Satin finish.
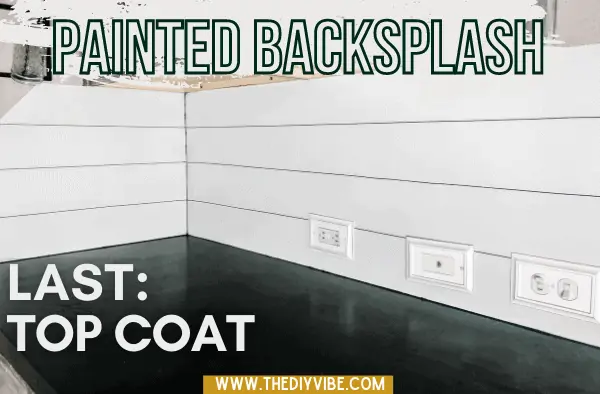
Step 5: Seal Painted Backsplash with Fusion Ultra Grip
It is time to peel the detail tape off. This part is so rewarding! Pull the detail tape off at an angle of completely backwards (not straight out) to get the most clean lines. Then take a minute to enjoy your beautiful design! What a crazy transformation, huh?!
Next, is where you can learn from my mistake. After peeling off the detail tape, I sealed the whole backsplash with Fusion’s Tough Coat. Although Fusion Tough Coat claims to be a non-yellowing top coat, the heat of our air fryer did cause it to begin to yellow.
If I were to do this project over again I would see if I could find a truly non yellowing top coat and/or paint that holds up to heat if you will be using any countertop appliances that emit heat directly out of the back towards the backsplash like our air fryer did.
*This yellowing nonsense might also not be a big deal if you are using a darker paint color for your backsplash.
Painted Backsplash Years Later
As far as holding up, it is now 2+ years post project and this painted backsplash is exactly as it was when I finished it. There has been zero peeling, chipping, or wear and tear marks from cleaning it, etc.
**No wear, beside the one corner where our air fryer was and the heat from it slightly yellowed the very top of the backsplash under the cabinets. You would have to go around with a bright light to even notice the slight yellow tone. However, I did start pulling the air fryer forward away from the backsplash while in use after noticing that initial yellow tone behind it. Otherwise I’m sure it would have gotten more yellow over time with the reoccurring direct heat on the painted backsplash.
Another DIY Kitchen Renovation: White Washed Kitchen Cabinets:
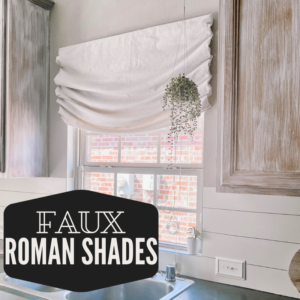
You probably noticed in the before-and-after photos that I revamped our Honey Oak Kitchen Cabinets with White Wash.
The White Washed Cabinets DIY was so rewarding because, wow, what an impact one change made! It also ended up being SO so so much quicker and easier than painting these cabinets would have been. I love the warmth and texture of the wood we still get with the white washed cabinets, as opposed to painting them stark white.
If you want to see the fast & easy way I White Washed our Honey Oak Kitchen Cabinets check out that DIY project here: White Washed Honey Oak Kitchen Cabinets.

























Leave a Reply