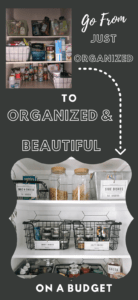
First we will cover the Planning Phase for your Pantry Organization so you will be sure that your pantry plan will work for the items you keep in your pantry. These 5 tips will customize a pantry organization plan tailored for your home and lifestyle. Then, you’ll see the 5 Tips to Implement your Pantry Organization Plan. After these 2 steps you will have all of your pantry items organized in a practical, concise and beautiful way!
Tips on Planning Your Pantry Organization
- Before you dive into your pantry organization project- Start paying attention to what you use all the time. For me it was truvia and cocoa powder for my delicious protein shakes; Oil and spices for cooking; And my precious snacks… must have both sweet & salty readily available depending on my mood- any other snack fiends?
- Think about what the kids use and put that on a shelf and in a container that is easy for them to access. For our kids it is Chex & Chocolate Chips & Truvia packets for breakfast, Chips for snacks, and Rice Crispy treats/fruit snacks/applesauce pouches for treats.
- Think about what will be really heavy and don’t put that up high. Putting things into bins makes it 1. More appealing to look at and 2. Saves space. For me this is cases of sparkling water and extra sauces. (I’m a sauce girl. It can be hard to find good sauces without a ton of sugar. So whenever I see a low sugar sauce I have to try it!)
- Think about what you always have on hand… for us that is Gluten Free Spiral Pasta & Spaghetti, Rice, Annie’s GF Mac & Cheese, Pasta Sauce & Parmesan (skinny pasta for me). Those are our staples for our go-to dinners for the kids.
- Think about what you use very occasionally. For me that is my baking supplies. I bake whatever shape/design GF cake my kiddos want for their bdays. Other than that it’s not very often. All of those rarely used supplies are grouped together in 3 bins and placed up high. So when you are going to bake, you just grab the bin down, and you’ve got all the stuff you need for baking.
Implement Pantry Organization Plan: Organize Pantry Items Per Category
Once you’ve accomplished the 5 tips above, you will move onto the next step to accomplishing your pantry organization goals! Time to start organizing each category of items you now have separated out with these tips in mind:
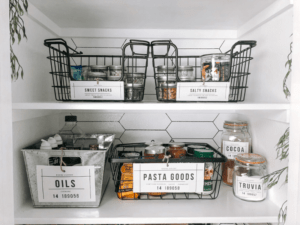
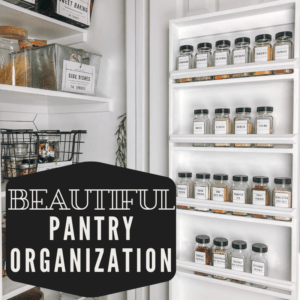
- The items you use all the time should be easily accessible. For items like sugar, flour & cocoa you can pour them into canisters. If it is food that is easier to keep in the containers they come in, like oil, canned food, boxed food, or chips, you can put those items into a pretty bin. My sweet & salty snacks were just a pile of ugly bags- they could go into mason jars and then be stacked nicely and it is easy to see all my options when the snack-attack hits. Spices can be made into a piece of art for $30 if you get a pack of matching spice jars on Amazon.
(Either this spice display will make your heart swoon, or you will not understand why anyone would pour spices from one perfectly fine container into another, lol!)
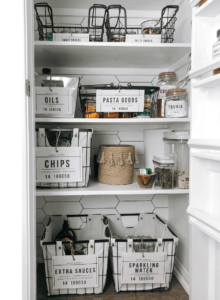
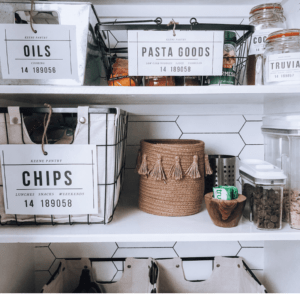
- For what the kids use, you will not want to have in glass containers, and you will not want to have anything in bins that will be heavy for them to maneuver. For our breakfast cereal, I couldn’t believe I actually spent $20 on this OXO Cereal Container, but I was in At Home and talked myself into it. The kiddos always break the box and the plastic bag inside so they spill it everywhere when they pour it out and it drives me nuts! This one had good reviews. So I figured it would last forever and keep the cereal fresh. It’s practical as well because the kids can all open and close it on their own. We got a smaller matching one for their chocolate chips that they add to their Rice Chex. I actually do love these containers. I appreciate them every morning when my kiddos are not ripping cereal boxes and spilling Chex everywhere. My daughter likes to sprinkle a packet of truvia on her Rice Chex. Therefore the truvia packets are next to the cereal. The Chips are super light and the bags are super ugly, ha! So a big bin it is! Super space saver too, because when not piled into a bin those bags of chips will take up so much more shelf space. The treats (rice crispy treats, fruit snacks, apple sauce pouches) are in a small round cotton bin and easy for them to grab as well.
- The heavy items should be as low as possible. I have a lot of floor space, so 2 big bins on the floor takes care of my extra sauces & cases of sparkling water & looks so much better than if they were stacked in ripped boxes and sauces of every color and shape stacked like a jenga tower in plain sight.
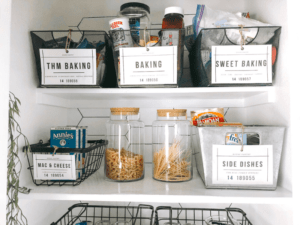
- The things you always have on hand… see if you can make them pretty? Since they will always be in your pantry they might as well be: (a) Pretty to look at and (b) Easy to tell when you need to restock. The glass jars with cork lids for the pasta I found at Michaels, I used a black wire bin for the mac & cheese boxes and I actually put the rice in one of my new big canisters on the countertop. The pasta sauce, parm & skinny noodles went into another metal bin.
- Baking supplies are piled high in the bins on the top. I can grab them easily enough on those rare occasions when it’s time to get my baking on.
Budget-Friendly Pantry Organization Hacks
To make your pantry organization budget friendly- do you have any bins or baskets you can make matchy with paint? Also, choose a color/colors and then look for canisters that fit into that scheme in the clearance and sale sections. Choosing one color for your pantry organization bins will make all different shapes and sizes look uniform enough to look cohesive together.
The color I chose was white and I saw several super cheap canisters and containers and lids at Homegoods, Hobby Lobby Clearance & Michaels. Another handy discovery- Extra large mason jars are WAY cheaper at Walmart than those craft stores, like one third of the price.
Overall, solid metal, wood, or fabric lined wire baskets will hide ugly packaging making your pantry organization nice to look at. Pretty labels go a long way in giving your pantry organization a cohesive feel. Plus they’re practical too! You won’t hear, “Mom, where is….” every 2 minutes;). I have created a post with a step-by-step tutorial with screenshots along the way of how to make these pantry organization labels, HERE!
Think of function first- thats the hack that will make it stay beautiful. But also, don’t be disappointed if you have to rearrange some things as you live with it. Make it easy and pretty! At 5pm when the dreaded cloud of what will I make for dinner starts looming… It will feel a little brighter and lighter as you peer into your beautiful organized pantry!
Pantry Organization Items Used:
Large fabric lined black wire baskets at the bottom- I got them from Walmart
Pantry Organization Market baskets- Costco
Galvanized metal bins– Walmart
Glass Canister with Cork Lids– Michaels *be sure to use a coupon from their website
Spice Jars– Amazon
Pantry organization is more fun with cute bins! I spray painted some silver metal baskets black to match the new black market baskets I got from Costco for a deal. Those adorable Costco market baskets sparked this whole pantry organization makeover! Anyone else do that? You see something you love- you didn’t know you needed- for a great deal- and just bring it home and see where it takes you?!
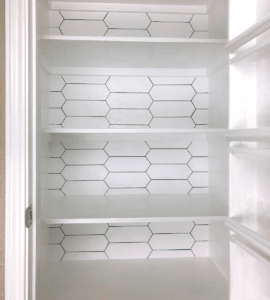
If you want to a pretty backdrop to begin your pantry organization- I have a tutorial on how to add the subway tile look with just a sharpie marker! This easy DIY subway tile would make a light, bright, & fresh backdrop to your pantry organization! Subway Tile Wall DIY
If you like the way our pantry wall looks, you’ll want to check out the tutorial to draw subway tile onto your wall! First, I painted the pantry walls and shelves and then added faux tile to the back wall. You can discover how fun & easy it is to Sharpie Subway Tile Onto Your Wall here!
 (Either this spice display will make your heart swoon, or you will not understand why anyone would pour spices from one perfectly fine container into another, lol!)


